If the thought of hosting your own webinar leaves you with sweaty palms and pre-stage fright, you’re not alone.
After reading a few ‘How To’ guides, I freaked out and had a team of three helping to ensure my first webinar went off without a hitch, and even then, the internet cut out a few times and my microphone was giving my voice a Batman’s-enemy-Bane kind of vibe.
I’m now a webinar veteran and I could host one in my sleep. I still occasionally lose the ability to string a sentence together or forget what notes correspond with which slide. But all in all, it’s a breeze and such a fantastic way to reach a wider audience in one fell swoop.
As you may have noticed from previous blogs, I am a big believer in sharing programs, ideas and efficiencies that have worked for me in the past, and how to make them work for you. This blog is no different, and I’m going to walk you through how to create your very own webinars.
This step by step guide will hopefully remove some of that stage fright and have you busting out webinars in no time.
1. Decide what your webinar is going to be about and then give it a name.
What are some of the most common questions you get asked? Or what is something you do well within your business that you’d like to share? Your webinar’s name should reflect this, but make sure it is something that will draw people in.
2. Create your webinar presentation.
This one took me a while because throughout all the How-To guides they kept referring to a ‘slide deck’ and I was thinking, what the hell is that? Turns out, it’s just a power point presentation. If you’re creative or have confidence in power point, then put together some ‘slides’ and hey-presto you’ve got your own webinar presentation.
3. Develop your communication.
Depending on what program you use, it might integrate with your existing emailing tool or it may not. It pays to develop communication for the following:
– Thanks for registering email
– Reminder that the webinar will begin in one day/one hour/15 minutes
– Thanks for attending/Sorry we missed you
You will also need to create advertising for your webinar, to post on social media and throughout your other communication channels. You’ll have a link to promote and somewhere to attach your communication after you complete the next step.
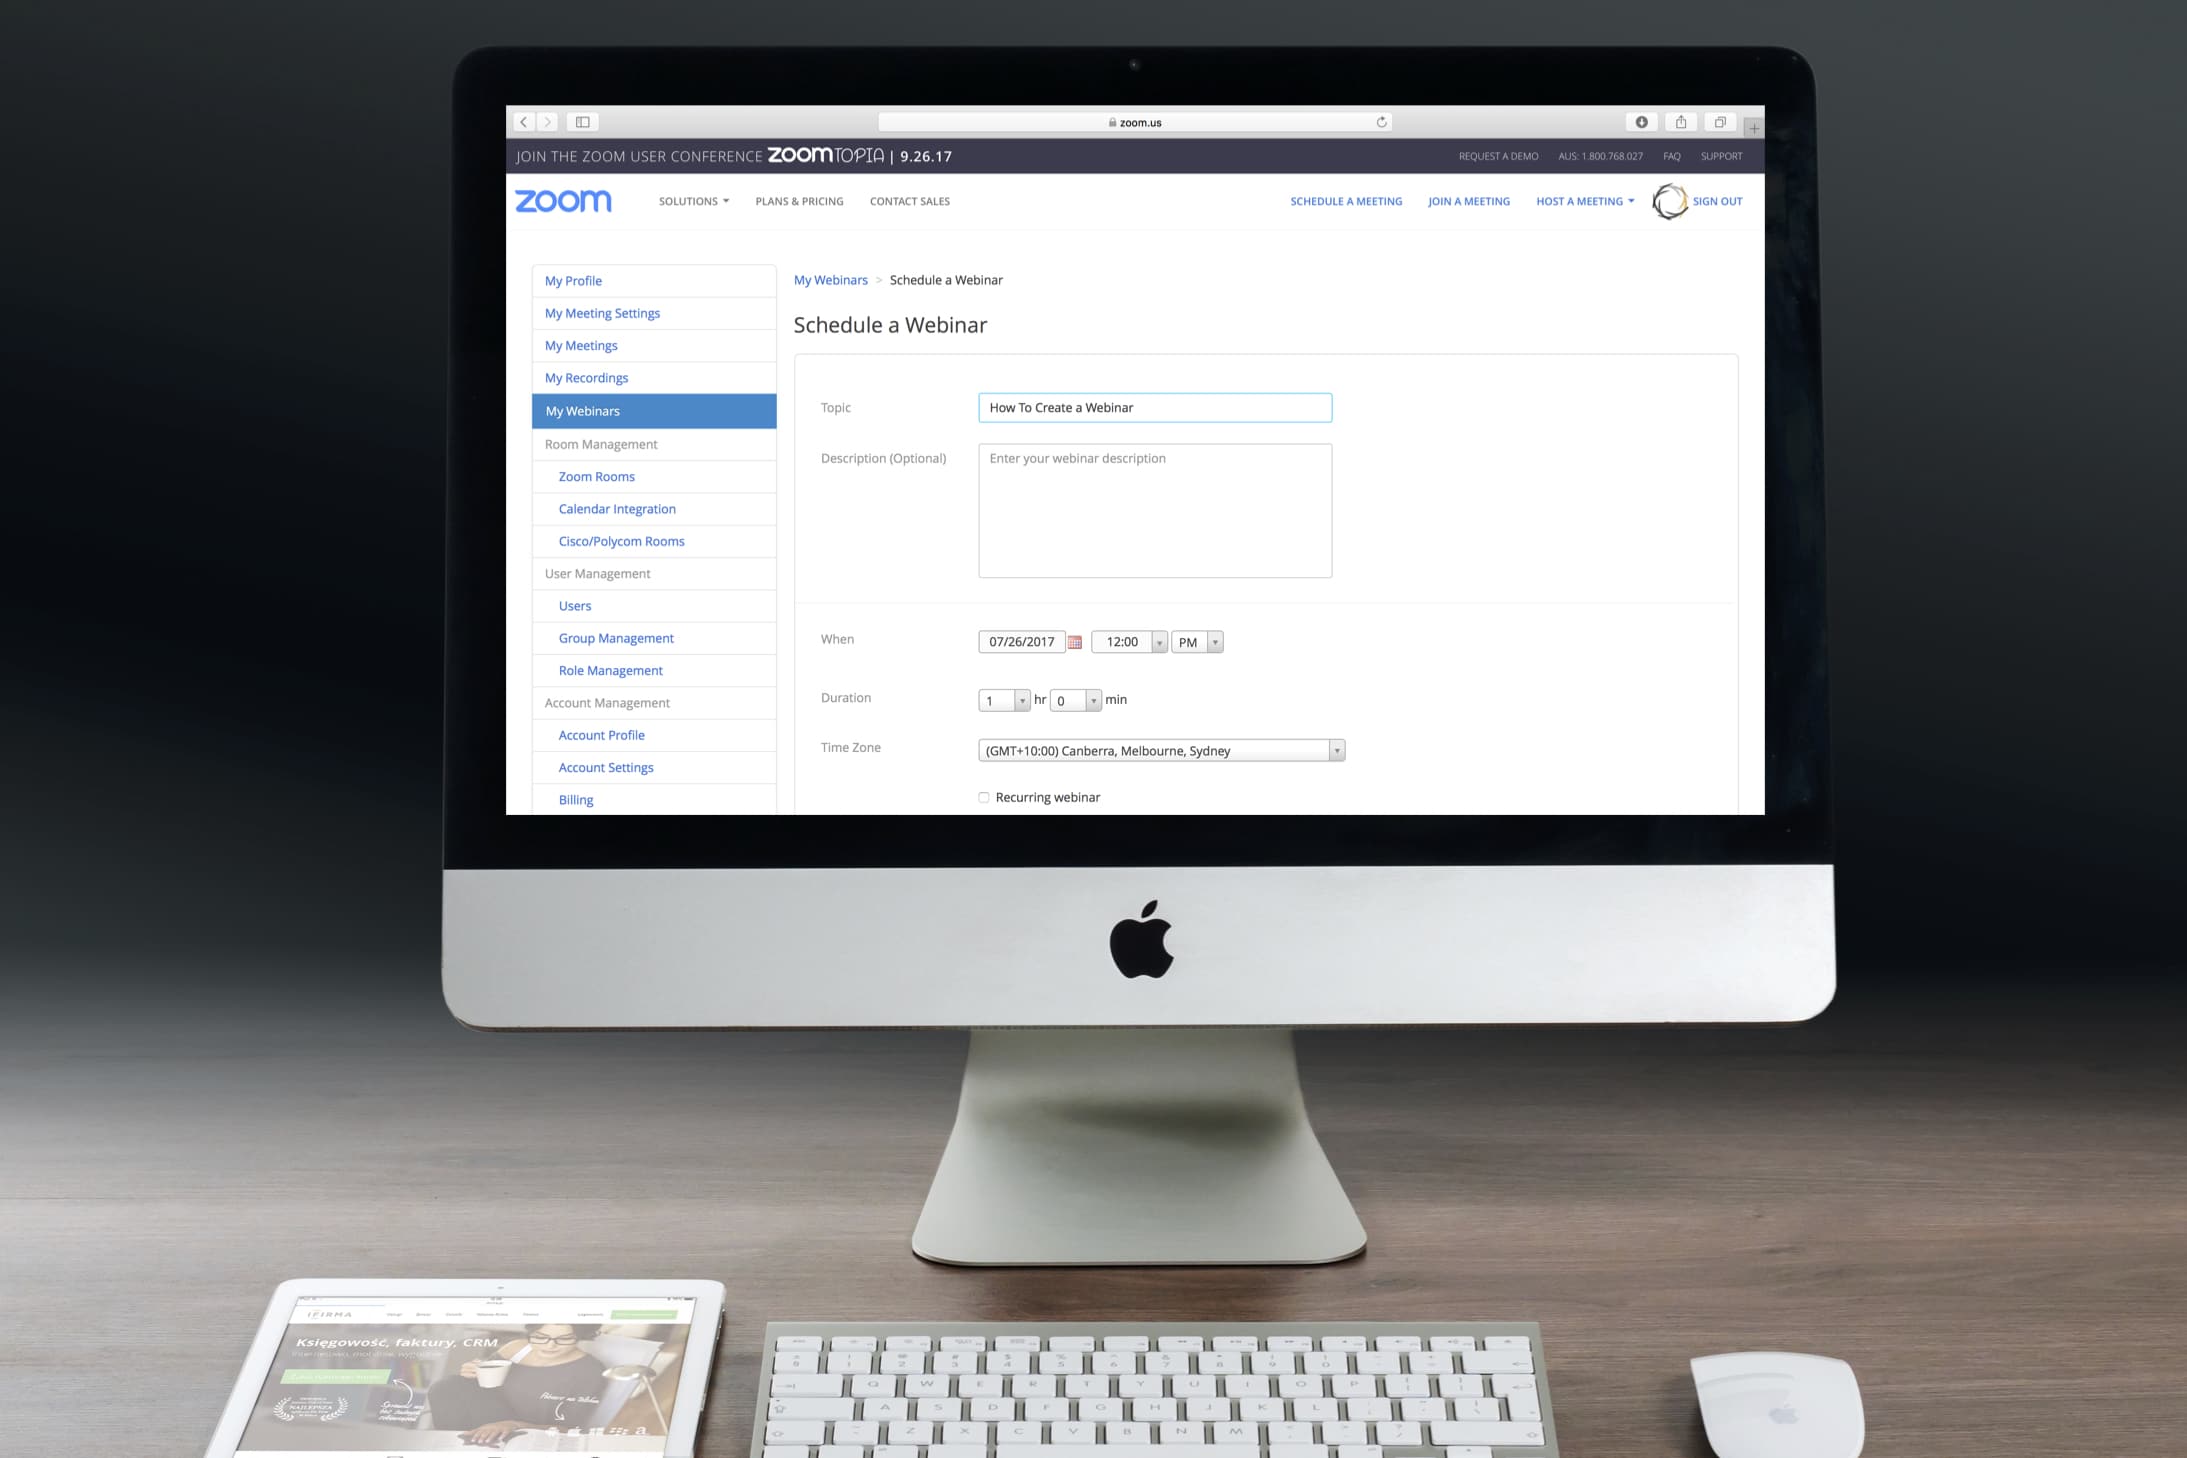
4. Schedule your webinar.
I use the program zoom. Once signed up it is really simple to use, and I now before I start a webinar, I schedule the next one. This is how simple it is for me to set up my webinars each month:
5. Host your webinar.
Yep, here comes the scary part. When you must sit in front of your computer and connect with anywhere from a handful of people to the equivalent of a full lecture hall. It pays to remember that those who have tuned in are hoping to learn something from you. They’re only human and know that you are too. Don’t stress if you stutter or accidentally skip a slide, they’ll understand as long as your content is beneficial and easy to understand.
6. Don’t go overboard.
Make sure you stick to your time limits and always ensure leave 5-10 minutes at the end of your webinar for questions.
It’s that simple. And don’t worry, like me you’ll soon find them addictive and want to be churning out more webinars, more often. Good luck!

